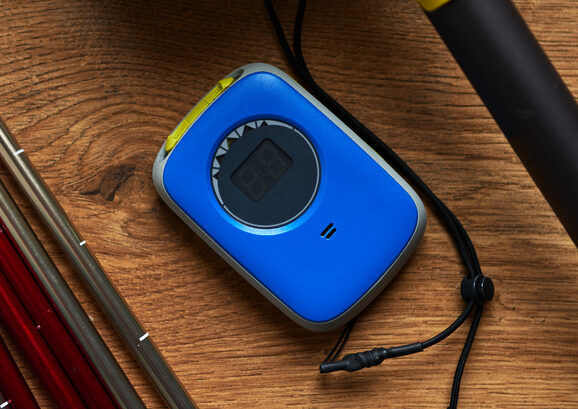

Investing in the FreeRide Essentials – transceiver, shovel, probe and backpack – is a big step in your FreeRide journey. You’ve invested in rescue equipment that could save the lives of your ski buddies, and possibly even the life of a buried stranger you haven’t even met yet. It could save your life too, should you be buried in an avalanche, but we hope it never comes to that.
You are now a member of the Rescue Community. What next? We think that the instruction manual that came with your transceiver is an excellent place to start your rescue training. To trust in your gear and your ability to use it, you need to get to know it first, so get reading and join the cover-to-cover crew.
Once you’ve read the instruction manual you’re going to need to undertake avalanche rescue drills, and you’re going to need to practice a lot. We recommend avalanche training with the buddies you ride with so that you can be confident in each others rescue skills. The good news is that, with a little bit of imagination (and perhaps a few side bets too), avalanche rescue practice can be both fun and rewarding. Learning how to rescue each other – there’s no bonding exercise quite like it!
The worst has happened and a rider has been caught in an avalanche. It’s a terrifying scenario, but one which plays out every season.
Avalanche rescue drills assume the victim is wearing a transceiver and cover a number of scenarios, starting with a solo rescue of a single victim (sometimes referred to as companion rescue). Once this drill is mastered, training progresses through to group rescue of a single victim and then group rescue of multiple burials. The gold standard required of professional mountain guides is a solo rescue of multiple victims.
However, regardless of scenario, avalanche rescue is broken down into six phases:
So, let’s get real. The worst has happened and a rider has been caught and buried in an avalanche. It’s a terrifying scenario but one which, sadly, plays out every season.
You are first on the scene. It’s down to you and time is not on your side. Assuming the victim has survived the melee of the avalanche and has been buried alive, they have a 90% chance of survival if you can dig them out within 15 minutes. If the rescue stretches to 30 minutes there is a 70% probability they will die of asphyxiation. The clock is now ticking…
Due to the extreme time pressure you are now under you’ll want to go exothermic and launch into your rescue at warp speed. Resist this very strong temptation and before you do anything else, assess the risk of a secondary avalanche. Is it safe for you to mount a rescue? Speed of rescue is critical but the underlying causes of the initial avalanche – such as a persistent weak layer – have not changed. You’re going to have to make some tough calls if the risk of further avalanches is significant. If you’re with a group you may be able to mitigate risk by holding some of your team back in a safe spot in case you are also buried.
Next, if possible, call search and rescue (SAR) services. If you have read Safety Basics, you will have already saved this number – noting that different countries (and even different ski domains) have different dialling codes and contact numbers.
The first question you will be asked is your location. What3Words is the easiest and fastest way to communicate this. If you haven’t already done so, download the app to your phone. Do it now because you definitely don’t want to be clutching at geographical straws on the Start Line.
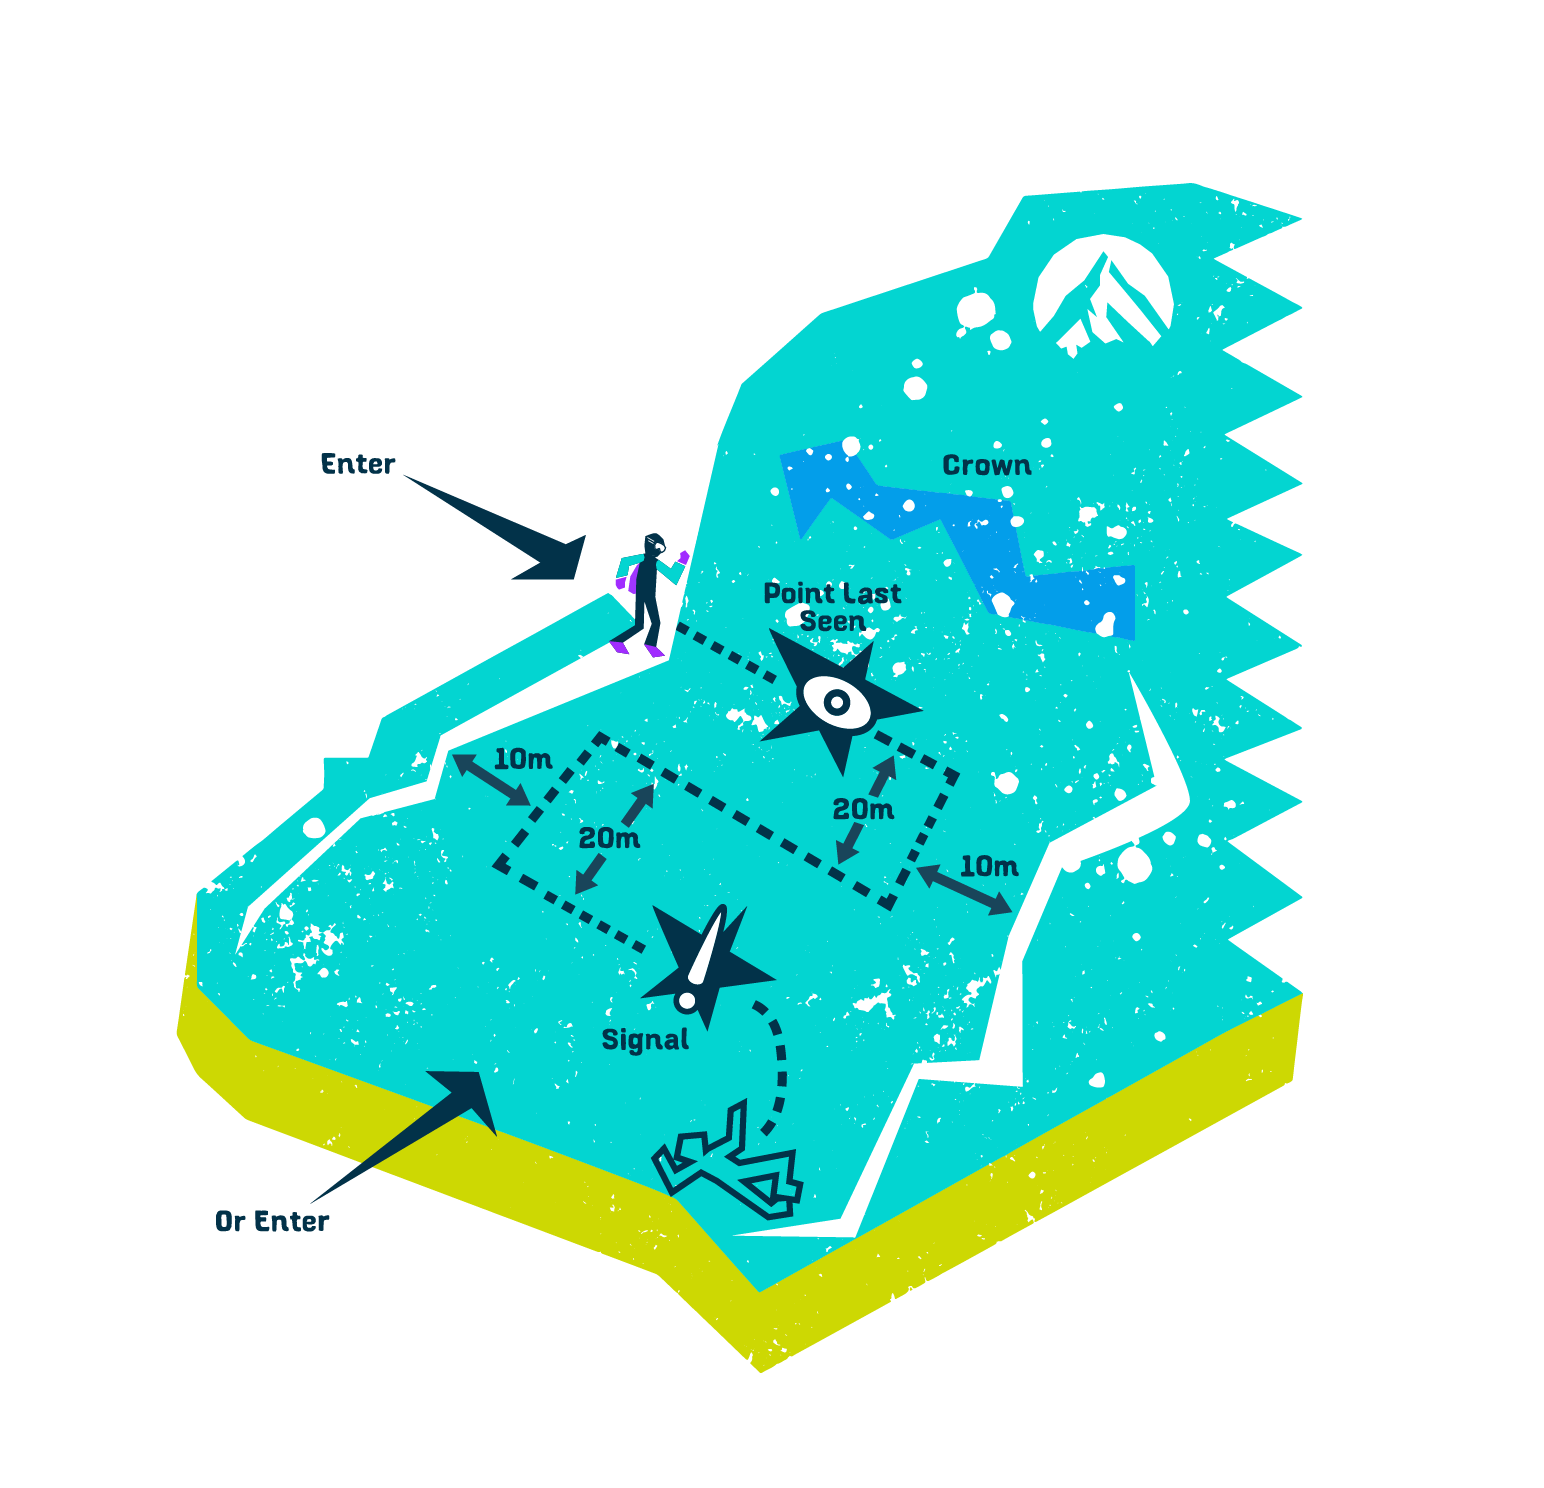
You now need to switch your transceiver to search mode and ensure anyone else crossing the Start Line does the same or your search will be compromised by their transceiver signal. Make your way to the last point where the victim was seen. You have now crossed the Start Line and are entering the second phase of your avalanche rescue.

At this point you’re just looking for the victim’s signal. From your last sighting of the avalanche victim, or the top of the avalanche debris field if there’s no victim sighting, work your way across the avalanche track being sure to maintain the same elevation as the point at which your started. Stop 10 metres short of the flank (the edge of the avalanche debris) and proceed downhill for 20 metres. Now turn back across the avalanche track to make a second pass, stopping 10 metres short of the opposite flank. You should end up 20 metres below your starting point like in the diagram below. Keep on repeating the process until your transceiver detects a signal. Depending on your own location relative to the avalanche it may be necessary to work uphill rather than downhill through the debris field, what’s important is that you clear the entire field, so avoid starting in the middle.
Please note that, depending on the model of transceiver and your ability, you may be able to extend the distance between each pass, but if you are at all uncertain stick to 20 metres, turning 10 metres from the edge of the debris path.
TIP: Know what 20 metres looks like on the ground and test yourself with a tape measure, a 20 metre length of string or by using your probe.

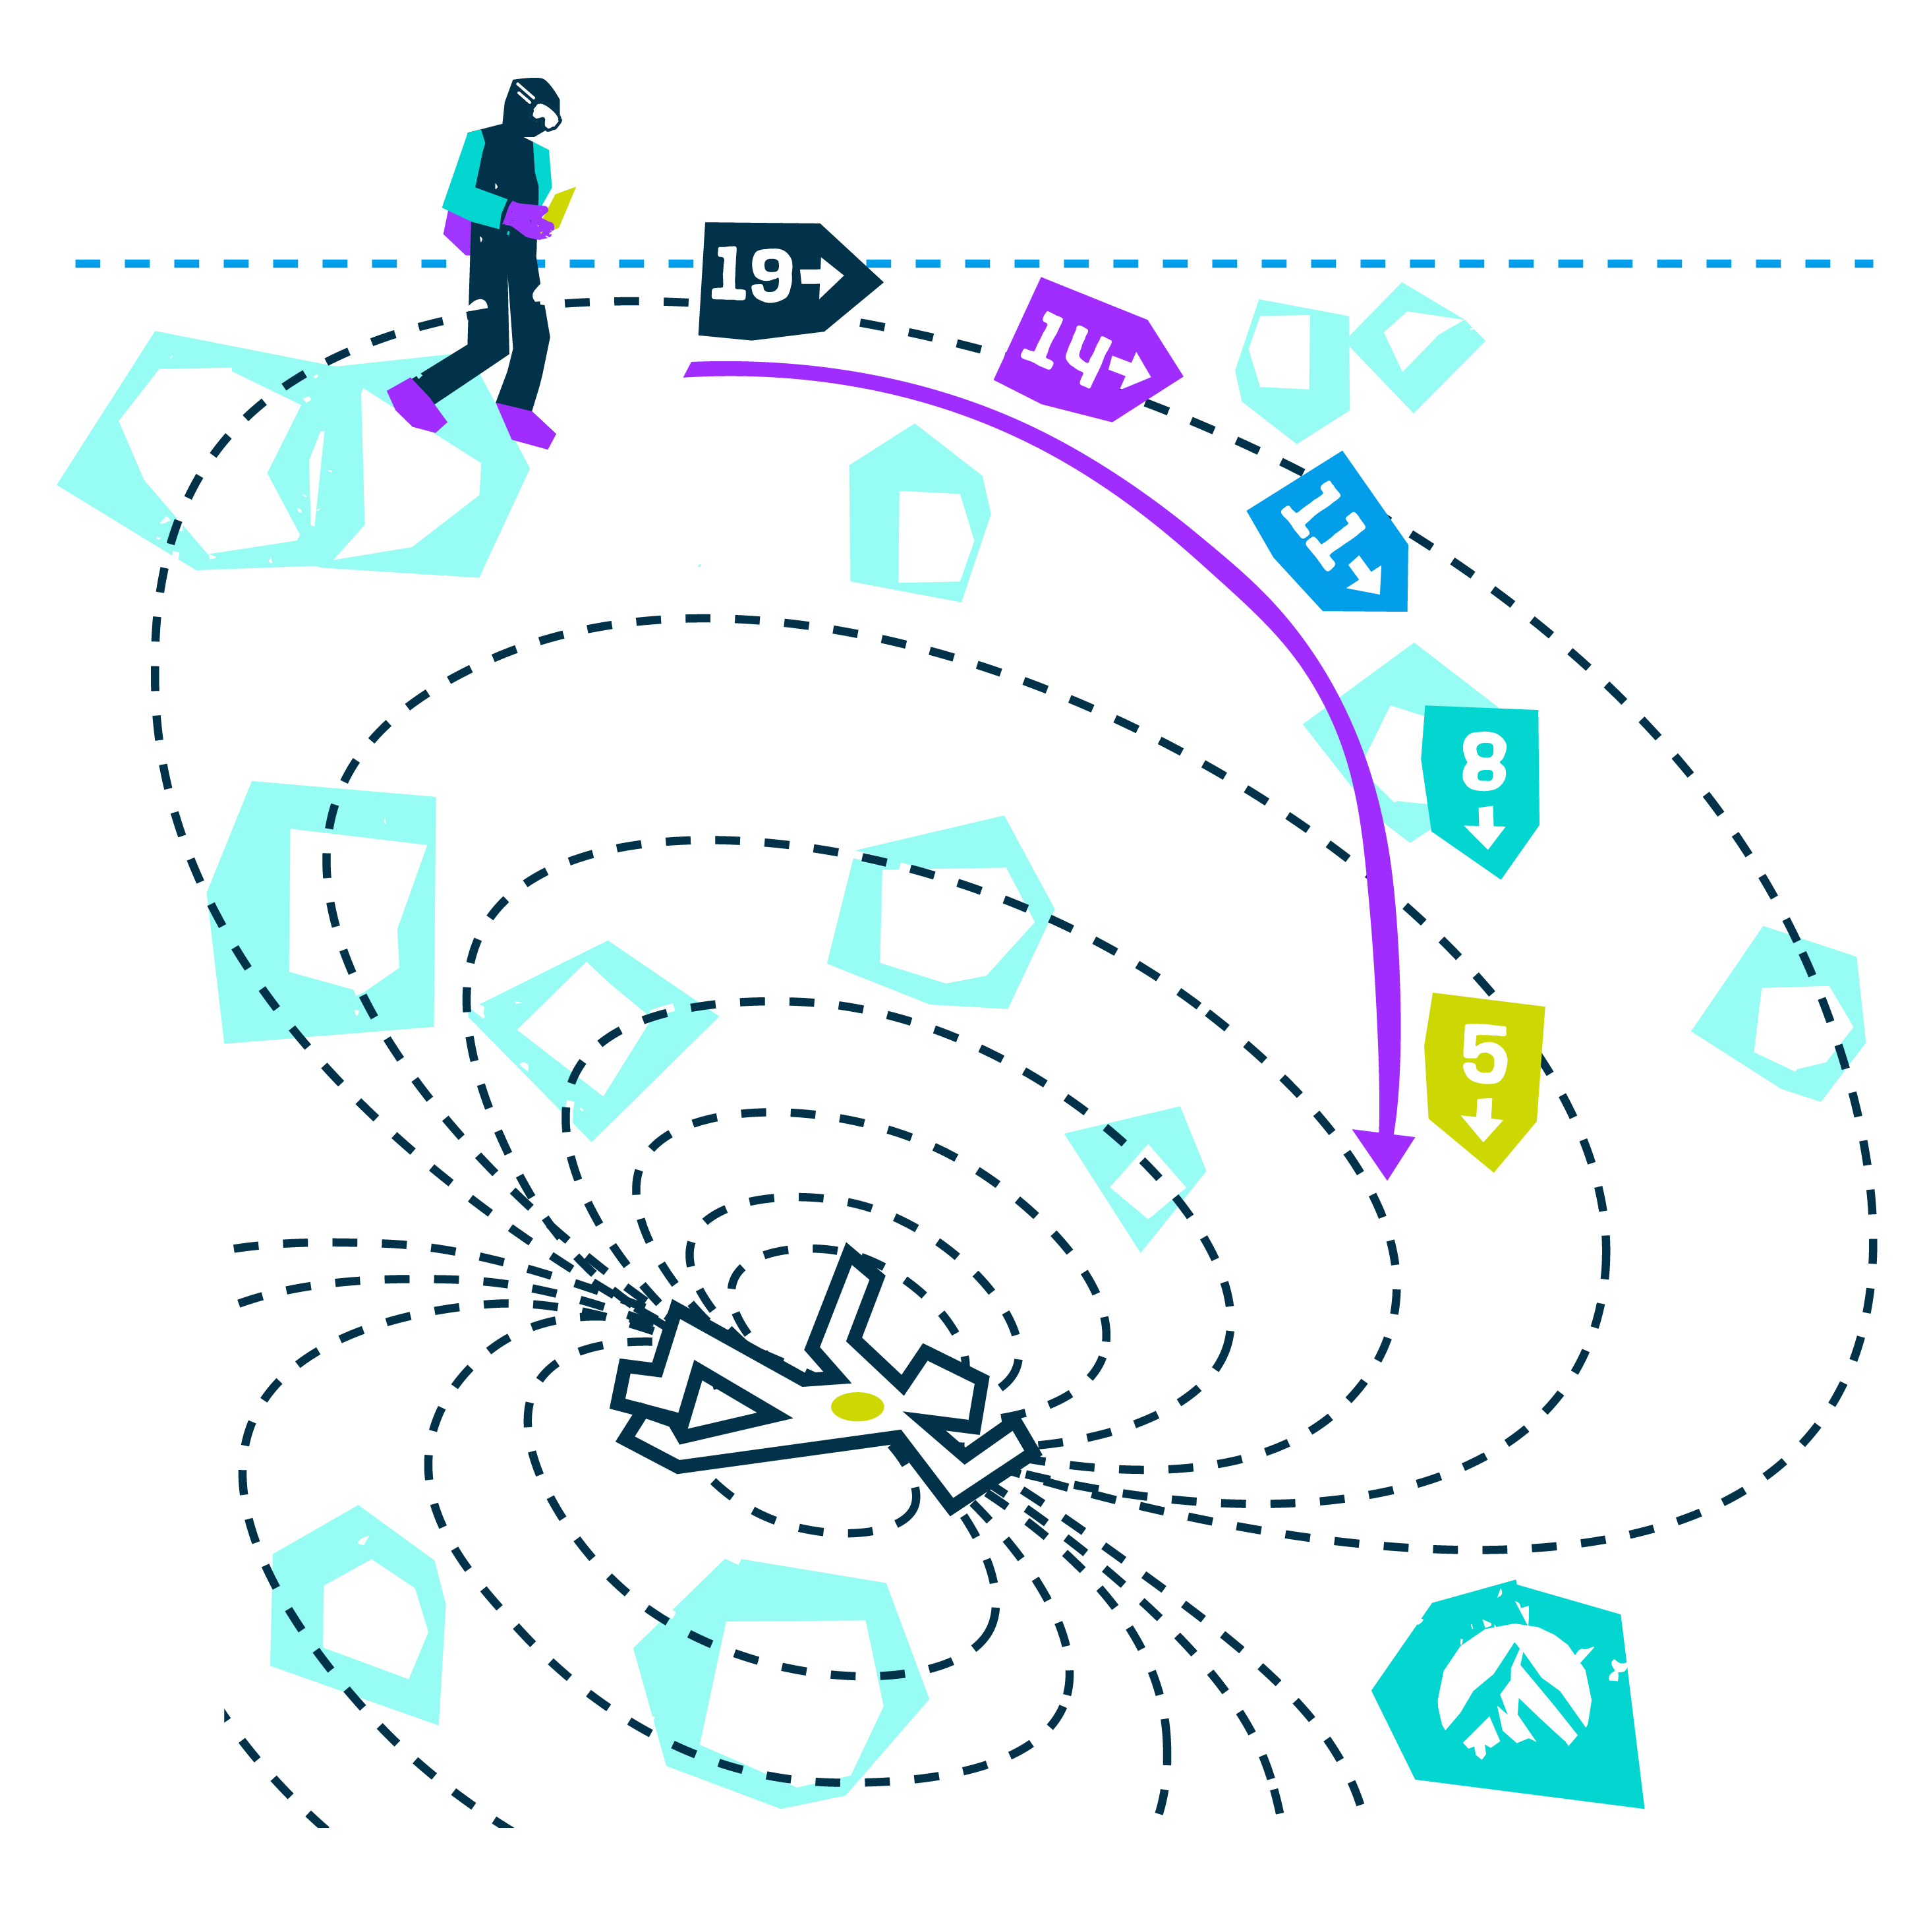
Once your transceiver detects a signal, align your beacon and follow until you are 5 metres from the victim. Keep an eye on the distance displayed on your transceiver screen. If it is going up rather than down, return to the spot where you picked up the signal and continue your signal search.
TIP: The transition from signal to coarse search is where knowing the limitations of your transceiver will pay dividends. On the margins of the search range, as the victim’s transceiver is detected for the first time, you’re likely to get some confused readings and the signal may even drop in and out. Knowing when to trust the strength of a reading and move to coarse search will come with practice and experience.

Once you are within 5 metres of the victim, slow your search and get down on your hands and knees. This way you will be able to place your beacon right on the snow surface. Now you can begin your fine search.
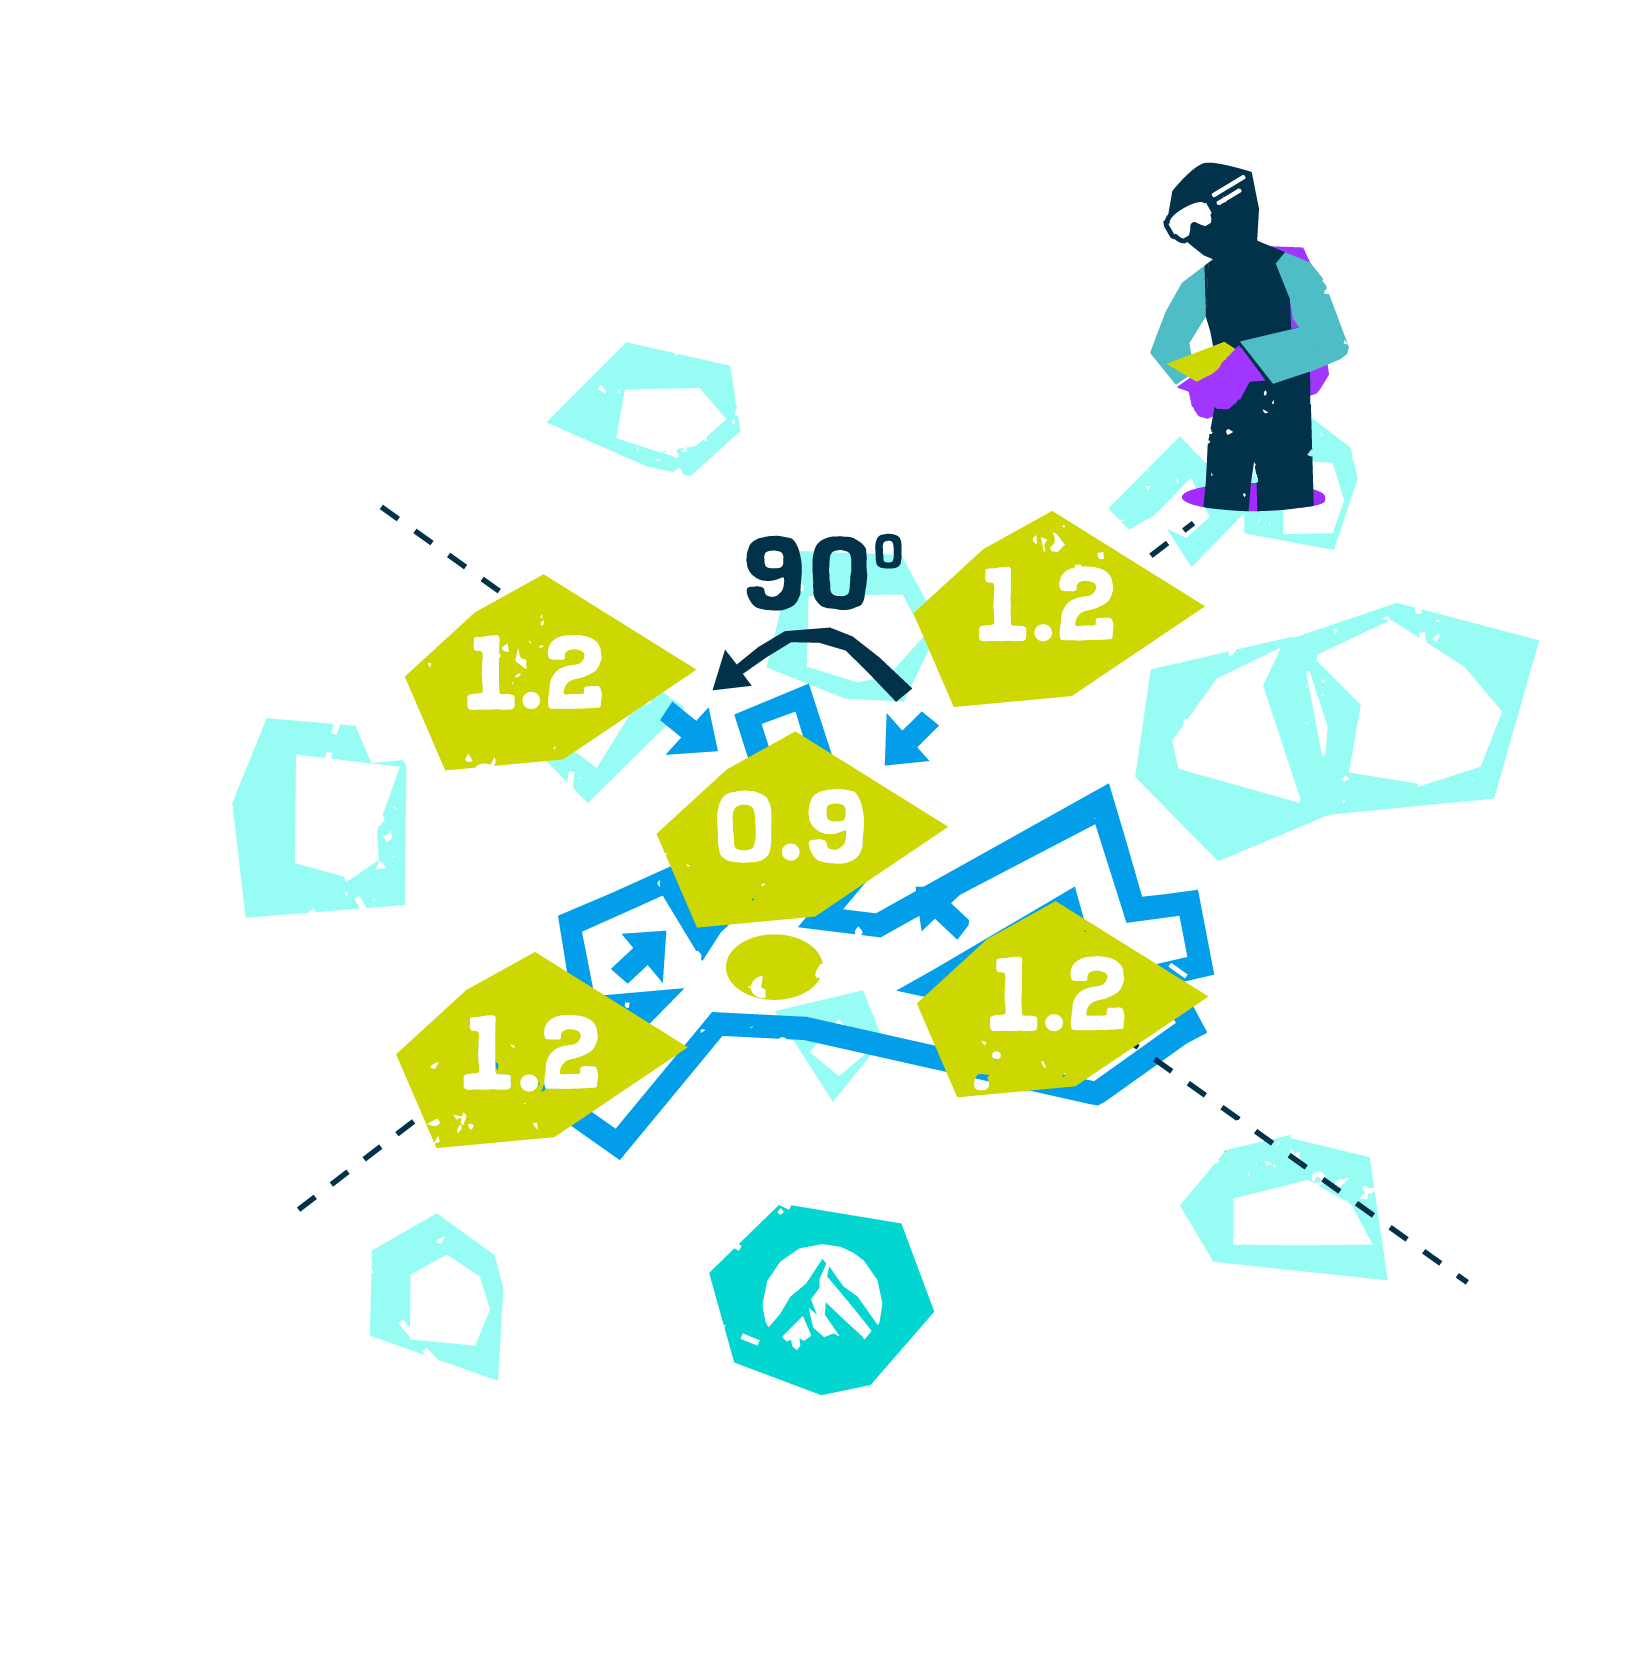
The victim is just 5 metres away, buried somewhere beneath the snow surface. You’re looking to establish the lowest reading on your transceiver, bearing in mind this will not be a zero reading. Keep moving steadily forward in a straight line with your eyes glued to your transceiver distance readings. This is now your sole focus – do not allow yourself to be distracted.
As you get closer your readings will go down, but at some point you are going to pass over the victim and your readings will start to go back up again. Stop. Return to the lowest reading and mark that point in the snow. Now, move the transceiver either 90° left or 90° right of that point, keeping a close eye on the distance readings as before. This is known as bracketing. Continue this process until you have established the closest or lowest reading. Make a mental note of the lowest distance (eg 1.5 metres) and mark that point. If you’ve searched correctly, the victim is directly below this point.
TIP: By this point in your search, you’re exhausted. Adrenaline is coursing through your veins and you’ve lost track of time yet simultaneously feel the pressure of the ticking clock. To calm your nerves and maintain concentration while bracketing, it can help to call out the distance readings on your transceiver.

Once you have marked the point with the lowest reading, resist the strong urge to start digging like mad and deploy your probe.
This is the moment you will be taking off your rucksack and delving inside to access your shovel and probe. It’s a good idea to assemble both at this point. Don’t be tempted to remove your gloves to speed this process up. If you do, your hands will get cold very quickly in the next phases which will slow you down more.
Resist the strong urge to start digging like mad and deploy your probe.
Pretty much all probes snap into place the same way – by throwing the tip away from you and pulling the cord or cable – but there are an infinite number of locking mechanisms. Make sure you know how to deploy and lock yours. The strength and integrity of your probe is dependent on all the sections fitting together correctly so it’s worth taking a second or two to check this. There’s a high risk it will fail or break if it hasn’t locked together.
Insert the probe into the marked point at 90°, perpendicular to the angle of the slope. If you’re lucky and you did your fine search correctly, you’re going to hit the victim first time at a depth that roughly corresponds with your transceiver reading. If not, keep probing in an expanding spiral leaving 25 – 30cm between each probe until you get a strike. Now leave the probe in place for reference.
TIP: To practice probing, place a transceiver into a well stuffed backpack to give yourself something reasonably sized to aim for and bury it in the snow. (Remembering first to check the transceiver is transmitting!) When you strike it with your probe, you’ll know – it will feel different to anything else in the snow.

Making a note of the depth of the burial from the markings on your probe (e.g. 1.5 metres), step downhill and estimate a point where you can dig straight forward to the tip of your probe. Using this method is safer for the victim – you reduce the risk of injury by standing on them or filling in their air pocket – but you will also conserve energy. Instead of digging down to the victim, dig into the hill to create a platform for CPR, First Aid, and re-warming. Extraction will also be easier.
You will be surprised at how exhausting moving snow can be so you should pace yourself. Think about where you deposit the snow as you dig – you should only have to move it once. If possible, let gravity help you by moving it diagonally downhill in the direction of your 4 or 8 o’clock.
On finding the body, quickly establish where the head is. Clearing the victim’s airway is your primary concern at this point. Any other injuries can wait.
TIP: When choosing your shovel, don’t be tempted by an inexpensive light-weight model with a plastic blade and a tiny handle – those are for ski-mo racers not FreeRiders (see Common Safety Mistakes when FreeRiding.) Bigger shovels move snow faster. Invest in the largest shovel that you can practically wield that will fit in your backpack. Consider a shovel that also doubles as a hoe to clear snow more effectively when you’re part of an extraction team.You may also need to get a specialised backpack, ideally one which has a separate compartment for your rescue gear.
Now you know how it’s done, you need to get out there and practice. And then practice some more. Here are some things to consider when setting up an avalanche rescue practice lane:
And finally, some top tips from the professionals.
A study of 120 rescue drills performed by professional ski patrollers identified the following findings:
So there you have it:
Explore the themes below to find the best home for the content you want to learn about:
Chris, Nic and one other (forgot his name – I’m bad with names, so sorry!!) took me and my friend out to teach us how to use our avalanche kit in Courchevel today (20/01/25). Chris talked us though how to use the transceiver, probe and shovel and then we each practiced out on the snow. Thanks to this course, and their knowledge I now feel super confident in using my avalanche kit! I think it’s so cool that Freeride Republic are sharing their tips on how to stay safe in the backcountry, thankyou again and hopefully we can ride together at some point this season!
– Georgia 🙂