This step-by-step guide covers the ski touring transition from travelling uphill on skins to being fully set up for the descent on skis. Efficient transitions reduce risk, save time, and keep your crew moving — especially when space is tight and conditions are less than friendly.
During the final minutes of your ascent, start looking for the best place to transition back to planks. The steeper or more technical the descent, the less space you’re likely to have — so assume your options will be limited.
As options may be limited, you may find yourself taking additional risk here than the transition you made to skins (See article Ski Touring Transitions: Planks -> Skins). That said, still think about finding a spot that avoids avalanche danger, offers some protection from the elements and where if possible it’s safe to move around.
The tighter the space the more important it is to be clear about your process. The consequence of dropping kit at the top of a couloir or on a ridge line is in a different league from the typical transition at the base of an ascent.
Know what order you are going to make the transition and where your kit is being stowed.
Once you’re safely positioned, stay clipped in on your skis. Stash your poles by planting them handle-first uphill, then dig a small pit in the snow. Set your pack back-panel-down into it, with the opening facing you for fast, controlled access. At this stage, every piece of gear matters—slow it down, stay deliberate, and make sure nothing can slide away.
You’ll cool down fast once you stop. Even if you feel hot from the climb, make warmth the priority. Replace any layers you’ve shed, close pit zips, and ensure your transceiver sits between your outermost base layer and your shell.
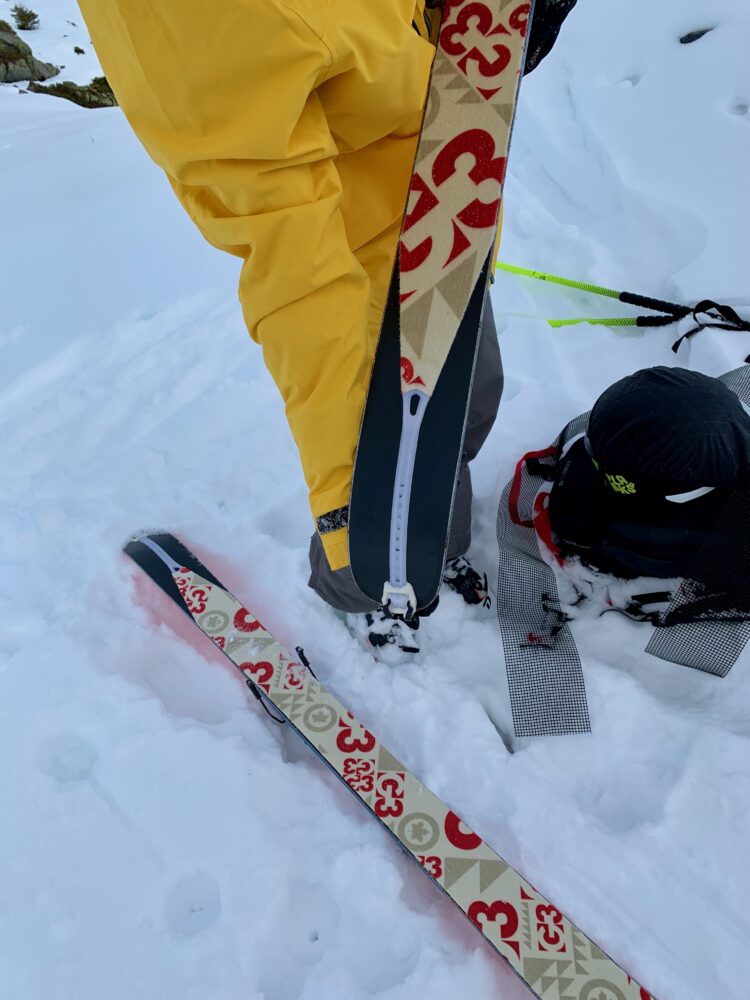
Remove your planks and stow your skins using whatever system works for you — folding, rolling, cheat sheets or not. What matters is that you can do it quickly, without exposing glue to snow or wind, and get them securely into your pack or jacket. Switch your bindings to downhill mode.
What you do with your planks once you have removed each skin will depend on space. Ideally you’ll be able to place them securely vertically in the snow but you might well find that the only practical option is to lay them in the snow. Do whatever you can to make them as secure as possible, not solely relying on the ski brake to stop them careering away from you.
Lock your boots into ski mode. Swap your hat for your helmet, change from contact gloves to riding gloves, zip up your pack, and do a final check that all kit is stowed before putting your pack back on.
Getting back into your bindings is often the trickiest part. Limited space, steep terrain and deep snow don’t make it easy. Take your time, position your planks as securely and flat as possible, and click into your downhill ski first.
Before dropping in, check in with your crew. Reassess conditions, agree on risk, confirm your drop order, and make sure everyone is ready. Once that’s done, it’s time to ride.
Keeping this kit easy to access will make every transition faster, warmer, and far less stressful.

Other transitions can be found in our Transitions Hub.
We’ll see you up there.
Explore the themes below to find the best home for the content you want to learn about: